
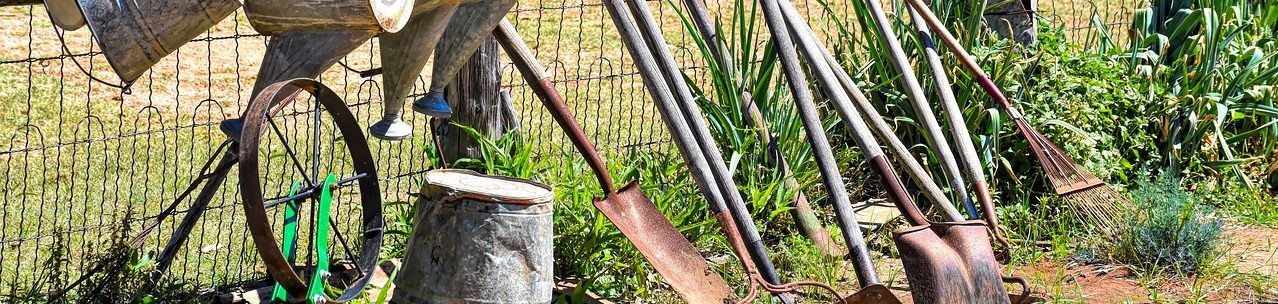

As the seasons change and the temperature drops, it’s time to think about winterizing your tools to ensure they remain in top condition for next spring. Whether you’re a seasoned gardener or just starting out, proper tool maintenance is essential for preserving the longevity of your gear and making sure it’s ready to go when the planting season rolls around again. In this step-by-step guide, we’ll walk you through the best practices for winterizing your gardening tools so they stay sharp, rust-free, and ready to use.
Why Winterizing Your Gardening Tools Matters
Before we dive into the specifics of tool maintenance, it’s important to understand why winterizing is so essential. During the colder months, gardening tools are exposed to moisture, dirt, and extreme temperatures, all of which can cause damage. Rust, dull blades, and worn-out handles are common issues faced by gardeners who neglect proper tool care. By taking the time to winterize your gear, you can:
Extend the life of your tools – Proper care can keep your gardening tools working for years.
Save money – Prevent the need for costly repairs or replacements by performing basic maintenance.
Improve efficiency – Sharper, well-maintained tools make gardening tasks easier and more enjoyable.
Let’s get started with a simple, step-by-step process for winterizing your tools!
Step 1: Clean Your Tools Thoroughly
The first step in winterizing your gardening tools is to give them a thorough cleaning. Dirt, sap, and plant matter left on tools can trap moisture and contribute to rust and corrosion. Here’s how to clean your tools effectively:
Scrub off dirt and debris – Use a stiff wire brush or a putty knife to remove soil and stuck-on plant material. For stubborn grime, use warm soapy water and a sponge.
Clean wooden handles – Wipe down wooden handles with a damp cloth to remove dirt. For deeper cleaning, use fine-grit sandpaper to smooth any rough patches or splinters.
Clean metal parts – Rinse any metal parts with water and wipe them dry to remove any remaining soil. A wire brush or abrasive cloth can be used to scrub off built-up debris.
By removing dirt and debris from your tools, you’ll prevent the accumulation of moisture, which could cause rust over the winter months.
Step 2: Remove Rust and Sharpen Blades
Rust is a common problem that can seriously damage your tools if not dealt with properly. Thankfully, it’s easy to remove and can be prevented with some simple maintenance.
Rust removal – If your tools have any rust spots, scrub them with steel wool or use a rust remover solution. You can also make a paste from baking soda and water to remove rust naturally.
Sharpen blades – Dull blades can make your gardening tasks more difficult and even damage plants. Use a sharpening stone, file, or specialized tool sharpener to restore the edge on tools like shears, hoes, and spades. Be sure to follow the manufacturer’s guidelines for sharpening to maintain the proper angle.
Tip: For a finer edge, sharpen tools after cleaning and rust removal, ensuring the blades are free of debris before sharpening.
Step 3: Oil and Lubricate Metal Parts
To prevent rust and maintain the functionality of your gardening tools, oiling and lubricating the metal parts is crucial. This creates a protective barrier that prevents moisture from penetrating and causing corrosion.
Oil your tools – Use a high-quality oil like vegetable oil, motor oil, or a specialized tool lubricant. Apply a thin layer of oil to all exposed metal parts, including blades, hinges, and handles.
Lubricate moving parts – Tools with moving parts, like pruners or shears, should be lubricated to ensure smooth operation. Use a light machine oil and apply it to the pivot points.
Make sure to wipe away any excess oil to prevent it from attracting dirt and dust.
Step 4: Protect Wooden Handles
Wooden handles can dry out, splinter, or crack over time if not properly maintained. To extend the life of your wooden-handled tools:
Sand and smooth handles – Sand down any rough spots on wooden handles to avoid splinters and maintain a smooth grip.
Condition with oil – After sanding, apply a coat of linseed oil or mineral oil to the wooden handles. This helps nourish the wood and prevents it from drying out and cracking during the winter months.
Pro Tip: For added protection, wrap the handles with cloth or twine to avoid direct contact with moisture.
Step 5: Store Your Tools Properly
Once you’ve cleaned, sharpened, and oiled your tools, proper storage is the final step in winterizing your gardening gear. Tools left out in the elements can deteriorate quickly, so it’s important to store them in a dry, sheltered space.
Find a dry, cool place – The ideal location for storing gardening tools during winter is a dry shed, garage, or basement. Avoid storing tools outside or in damp places, as this can lead to rust.
Hang tools – Hanging your tools on a wall or pegboard helps keep them off the ground and prevents moisture from accumulating. It also makes it easier to organize and find tools when you’re ready to use them again.
Use tool storage boxes – If you don’t have wall space, consider using tool storage bins or toolboxes. Make sure these containers are waterproof to protect your tools from humidity.
Step 6: Check and Maintain Tools Regularly
Before storing your tools away for the winter, inspect each item for any signs of damage, wear, or needed repairs. Check for loose screws, cracked handles, or wobbly blades, and address any issues before they worsen over the winter.
Regular Maintenance: Even when not in use, take the time to inspect your tools at least once a month. This ensures they remain in optimal condition when the gardening season comes around again.
Winterizing Your Tools: Final Thoughts
Winterizing your gardening tools is a small effort that yields big rewards in the long run. By following these simple steps—cleaning, sharpening, oiling, and properly storing your tools—you’ll extend their lifespan and ensure they’re ready to tackle your gardening tasks come spring.
With a little care and attention, your tools will be prepped for whatever projects lie ahead, and you’ll be able to hit the ground running when the weather warms up again.
