

Discover how to plant garlic in your home garden this fall with our easy-to-follow guide. Get tips on soil preparation, planting techniques, and care to ensure a bountiful harvest next summer.
Garlic is a fantastic addition to any home garden, offering a multitude of culinary uses and health benefits. Planting garlic in the fall is an excellent way to get a head start on a bountiful summer harvest. If you’re wondering how to plant garlic in your home garden this fall, you’ve come to the right place. In this comprehensive guide, we’ll cover everything you need to know to ensure your garlic bulbs grow strong and flavorful.
Why Plant Garlic in Fall?
Planting garlic in the fall allows the bulbs to establish strong roots before the winter sets in. This winter vernalization process helps produce larger and more robust bulbs. In cooler climates, garlic planted in the fall will have a head start when spring arrives, leading to a richer and more plentiful harvest in summer.
Choosing the Right Garlic Varieties
There are two main types of garlic you can plant: Hardneck and Softneck.
- Hardneck Garlic: Known for its robust flavor and easier peeling, hardneck garlic is ideal for colder climates. Varieties include Rocambole and Porcelain.
- Softneck Garlic: This type has a milder flavor and stores well over long periods. It is better suited for warmer climates and includes Artichoke and Silverskin varieties.
Preparing the Soil
Garlic thrives in well-drained, fertile soil with a pH between 6.0 and 7.0. Follow these steps to prepare your soil:
- Choose a Location: Select a sunny spot in your garden that gets at least 6 hours of sunlight a day.
- Test the Soil: Use a soil test kit to check pH and nutrient levels. Amend the soil as needed with compost to improve fertility and drainage.
- Prepare the Bed: Loosen the soil to a depth of about 8-10 inches. Mix in compost or aged manure to enhance soil structure and nutrients.
Planting Garlic
- Break Apart the Bulbs: Just before planting, separate the garlic bulbs into individual cloves. Choose the largest cloves for planting, as they will produce larger bulbs.
- Plant the Cloves: Space cloves 4-6 inches apart in rows. Plant them about 2 inches deep, with the pointed end facing up. If you’re planting multiple rows, space them about 12 inches apart.
- Watering: Give the garlic a thorough watering after planting. Ensure the soil remains consistently moist but not waterlogged throughout the growing season.
Mulching and Winter Care
Mulch is essential to protect garlic from extreme cold and to suppress weeds. Here’s how to mulch effectively:
- Apply Mulch: After planting, cover the garlic bed with 4-6 inches of organic mulch, such as straw or leaves.
- Winter Protection: In very cold climates, additional winter protection may be needed. Consider adding a layer of burlap or a frost blanket over the mulch.
Spring and Summer Care
As the weather warms up in spring, follow these tips to ensure healthy garlic growth:
- Remove Mulch: In early spring, gently remove the mulch to allow the garlic to emerge.
- Fertilize: Apply a balanced fertilizer or compost around the garlic plants to boost growth.
- Watering: Keep the soil evenly moist throughout the growing season, especially during dry spells.
Harvesting and Storing Garlic
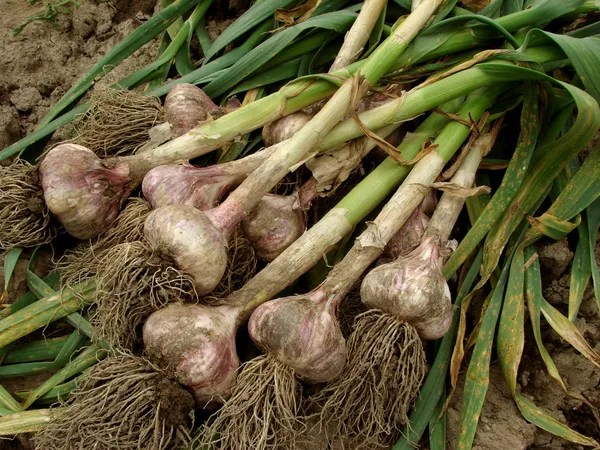
Garlic is typically ready to harvest in mid to late summer when the lower leaves begin to yellow and dry out.
- Harvesting: Gently loosen the bulbs with a fork or spade, being careful not to damage them. Pull the bulbs from the soil by hand.
- Curing: Brush off excess soil and let the garlic cure in a warm, dry place with good airflow for about 3-4 weeks.
- Storing: Once cured, trim the roots and stems, and store garlic in a cool, dry place. Well-stored garlic can last several months.
Conclusion
Planting garlic in the fall is a rewarding and relatively simple gardening task that promises a flavorful harvest come summer. By choosing the right variety, preparing your soil, and following proper planting and care techniques, you’ll set the stage for a successful garlic crop. Enjoy the process and the delicious results of your homegrown garlic!
